Proxy App Component
Introduction
This tutorial is intended for developers creating microapps that require OAuth authentication with third-party providers. It assumes you're familiar with basic React concepts and the Invent widget development environment.
By the end of this tutorial, you'll understand how to integrate the ProxyApp component from the @invent/proxy-app-components library. You'll implement a login flow that either displays a Microapp or prompts the user to authenticate, and learn how to make authenticated requests to third-party services through Invent's YARP proxy.
Microapp examples using this pattern include: Outlook Calendar, Redtail Notes, and others.
End-User Flow
The ProxyApp component will display the Microapp directly if the user is already authenticated with the target integration.
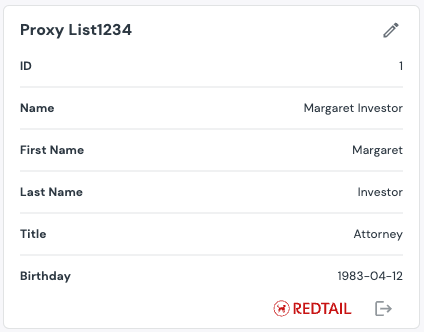
If not, a Connect button will appear:

Clicking this button opens an authentication modal:
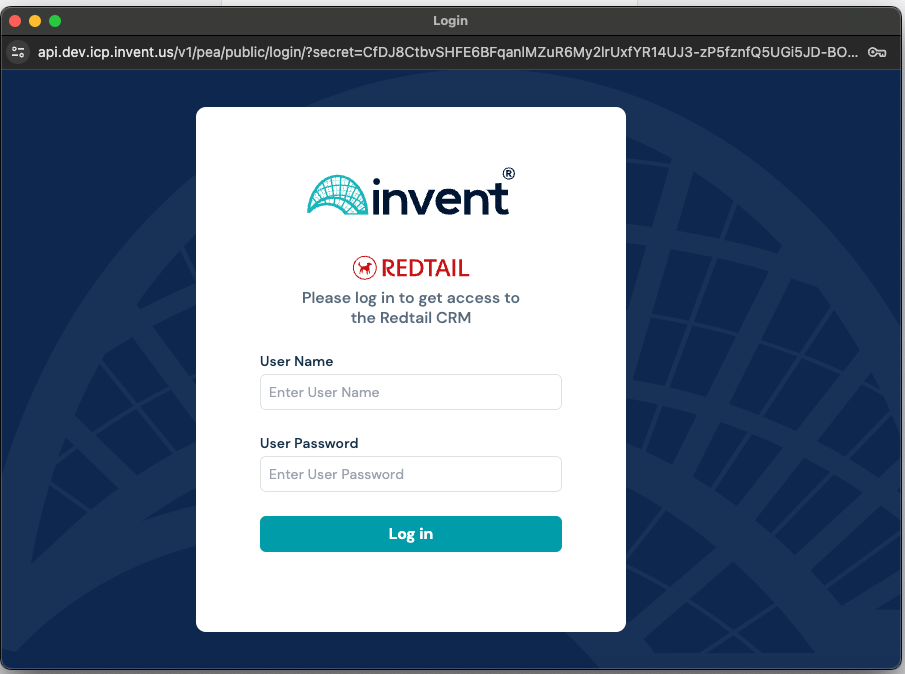
After successful login, the modal closes and the Microapp is shown in place of the login screen.
Installation
To get started, install the ProxyApp components package:
npm install @invent/proxy-app-components
Overview
The @invent/proxy-app-components library provides a set of components and hooks to facilitate the integration of third-party authentication flows into your microapps. It simplifies the process of handling OAuth authentication, managing user sessions, and making authenticated API calls to third-party services.
It offers several approaches to microapp development depending on your needs and the required flexibility.
Option 1: Using the ProxyApp component
This option is suitable for most cases where you simply need to integrate authentication and API proxying. It provides a ready-made component that handles the entire authentication process, allowing you to focus on developing your application.
Option 2: Using the ProxyAppMulti component
This option is suitable for cases where you need to support multiple accounts for the same provider. It not only handles authentication but also allows you to manage multiple accounts and switch between them.
Option 3: Using the ProxyLogin component
This option is suitable for cases where you need complete control over the authentication and integration process. It provides basic components and hooks that you can use to create your own solution. This option requires more development effort but offers maximum flexibility. Now that you know what you need, let's move on to the integration.
ProxyApp Component
Step 1: Integrate ProxyApp
In this step, you'll integrate the authentication logic into your widget.
Import what you need
import { ProxyApp } from "@invent/proxy-app-components";
Use the ProxyApp component
ProxyApp handles the complete authentication flow and renders your custom component when authenticated:
export function MyWidget({ httpClient }) {
  return (
    <ProxyApp httpClient={httpClient} provider='myProvider'>
      <MyCustomComponent />
    </ProxyApp>
  );
}
Your custom component receives authentication and API utility functions as props:
import React, { useEffect, useState } from "react";
import {
  ProxyCustomComponent,
  useAuthContext,
} from "@invent/proxy-app-components";

function MyCustomComponent(props: ProxyCustomComponent) {
  const { proxyCall, configurationId } = props;

  // You can also get all the props from the context:
  // const { proxyCall, configurationId } = useAuthContext();

  const [data, setData] = useState([]);

  useEffect(() => {
    // Use the provided proxyCall to make authenticated requests
    if (configurationId) {
      proxyCall("/your-endpoint").then((response) => {
        setData(response.data);
      });
    }
  }, [proxyCall, configurationId]);

  return <div>{/* Your component content */}</div>;
}
Use the ProxyAppMulti component
If you need to support multiple instances for the same provider, use the ProxyAppMulti component:
export function MyWidget({ httpClient }) {
  return (
    <ProxyAppMulti
      httpClient={httpClient}
      provider='myProvider'
      render={({ configurationId, selectorSlot, proxyCall }) => (
        <MyCustomComponent
          configurationId={configurationId}
          selectorSlot={selectorSlot}
          proxyCall={proxyCall}
        />
      )}
    />
  );
}
import React, { useEffect, useState } from "react";
import {
  ProxyCustomComponent,
  useAuthContext,
} from "@invent/proxy-app-components";
function MyCustomComponent(props: ProxyCustomComponent) {
  const { proxyCall, configurationId } = props;

  // You can also get all the props from the context:
  // const { proxyCall, configurationId } = useAuthContext();

  const [data, setData] = useState([]);

  useEffect(() => {
    // Use the provided proxyCall to make authenticated requests
    if (configurationId) {
      proxyCall("/your-endpoint").then((response) => {
        setData(response.data);
      });
    }
  }, [proxyCall, configurationId]);

  return <div>{/* Your component content */}</div>;
}
Use the ProxyLogin component
If you need to implement a custom authentication flow, use the ProxyLogin component:
import { useAuth, ProxyLogin } from "@invent/proxy-app-components";
import Skeleton from "./Skeleton";

export function MyWidget({ httpClient }) {
  const { isLoggedIn, error, config, ...rest } = useAuth({
    authUrl: "https://api.icp.invent.us/v1/pea",
    httpClient,
    provider: "myProvider",
  });

  // If config is not available, then request to PEA is still in progress
  // and we can show a loading state
  if (!config) {
    return <Skeleton />;
  }

  // If there was an error during the authentication process, show the error
  if (error) {
    return <ProxyLogin httpClient={httpClient} error={error} />;
  }

  // If the user is not logged in, show the login screen
  if (!isLoggedIn) {
    return (
      <ProxyLogin
        httpClient={httpClient}
        provider='myProvider'
        isLoggedIn={isLoggedIn}
        {...rest}
      />
    );
  }

  // Otherwise, show the main content of your microapp
  return (
    <div>
      <h1>Welcome to the Microapp!</h1>
      <p>Your configuration ID is: {config.configurationId}</p>
      <p>Your provider is: {config.provider}</p>
      {/* Your custom component logic goes here */}
    </div>
  );
}
Step 2: Query a third-party service
Once the user is authenticated, you can send proxied requests to third-party services using the provided utility functions.
proxyCall is a function that allows you to make authenticated requests to the third-party service.
You can use it to fetch data or perform actions on behalf of the user.
apiCall is a function that allows you to make requests to the DAP API.
Fetch the pass-through identifier
You’ll first need to get the external configuration ID from the DAP API:
const dap_api_url = "...";
const entityType = "...";
const entityIdType = "...";
const entityId = "...";

const getEntitiesSource = async () => {
  const { apiCall } = useAuthContext();
  const response = await apiCall(`${entityType}/origins`, {
    method: "get",
    traceId: "your-trace-id",
    params: {
      queryParams: {
        entityIdType: entityId,
      },
    },
  });
  return response;
};
This returns an array of Origin objects, including the externalConfigurationId.
interface Origin {
  sourceCode: string;
  originalAppId: string;
  originalAppTitle: string;
  originalAccountId: string;
  externalConfigurationId: string;
  masterAccountIds: string[];
  firmId: string;
}
Make the third-party API call
Using the ID you fetched, query the third-party endpoint:
// Inside your custom component
const { proxyCall } = useAuthContext();

const getEntity = async (externalConfigurationId: string) => {
  const response = await proxyCall(`third_party_endpoint/entities`, {
    method: "get",
    traceId: "your-trace-id",
    params: {
      queryParams: {
        entityId: externalConfigurationId,
      },
    },
  });
  return response;
};
Full example
const dap_api_url = "...";
const entityType = "...";
const entityIdType = "...";
const entityId = "...";

const { apiCall, proxyCall } = useAuthContext();

const getEntitiesSource = async () => {
  const response = await apiCall(`${entityType}/origins`, {
    method: "get",
    traceId: "your-trace-id",
    params: {
      queryParams: {
        entityIdType: entityId,
      },
    },
  });
  return response;
};

const getEntity = async (externalConfigurationId: string) => {
  const response = await proxyCall(`third_party_endpoint/entities`, {
    method: "get",
    traceId: "your-trace-id",
    params: {
      queryParams: {
        entityId: externalConfigurationId,
      },
    },
  });
  return response;
};

const getEntityData = async () => {
  const sourcesResponse = await getEntitiesSource();
  const entity = await getEntity(sourcesResponse.data.externalConfigurationId);
  console.log(entity);
};
getEntityData(id);
Conclusion
In this tutorial, you learned how to use the ProxyApp components from the @invent/proxy-app-components library to integrate OAuth authentication and API proxying into your microapps. You also learned how to make authenticated requests to third-party services using the provided utility functions.
This approach simplifies the authentication process and allows you to focus on building your application without worrying about the underlying authentication flow.